Small Hardwood Floor Repairs: When a Patch Is Enough and When to Call a Pro
A small patch may be enough for an isolated surface mark or one damaged board. Deep damage, moisture problems, or widespread finish wear call for a professional assessment to decide whether repair or full refinishing is appropriate.
Which hardwood floor problems may need only a small patch?
Light finish scratches and isolated board damage may be suitable for targeted repairs. Moisture damage, loose boards, and recurring gaps need an assessment of the cause before a repair is chosen.
Minor surface imperfections happen in every home. Everyday traffic, dropped utensils, shifting chair legs, and indoor climate changes leave visible marks over time. Many of these issues remain purely cosmetic and sit entirely within the top finish coat.
As a professional flooring company, we assess whether a small patch can improve your floor’s appearance or whether more extensive restoration is needed. Damage limited to the finish may be suitable for a targeted repair without disturbing surrounding boards. Touch-up markers and hard wax sticks may conceal small marks, but incompatible products can affect the existing finish. Heat and moisture can also damage finished wood. Have a flooring professional assess the damage before choosing a treatment.
Surface Scratches and Dents
Superficial scratches usually affect only the clear protective finish. For light scuffs, cleaning the area and using a dedicated touch-up marker or hard wax stick helps conceal the mark. Color or wax may leave a visible mismatch or interfere with later coating. A flooring professional can check compatibility with your existing finish.
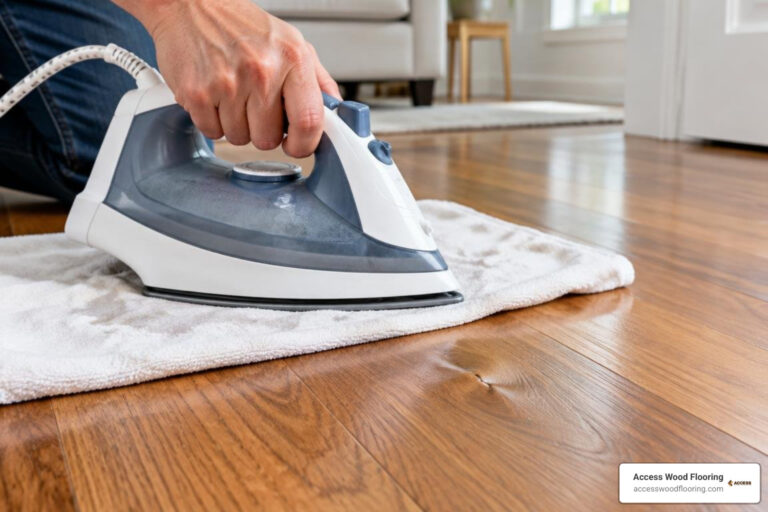
Dents occur when heavy objects crush the wood cells without cutting across the grain. Steam may raise some compressed wood fibers, but heat and moisture can damage the finish or surrounding wood. Have a flooring professional assess the dent rather than applying a household iron to a finished floor.
If the wood grain was cut or torn during the impact, steam alone will not solve the issue. Deeper gouges require dedicated hardwood floor repair from a flooring professional. Local sanding can leave a depression or visible patch, and a new coating may not bond to the existing finish.
Silencing Squeaks and Seasonal Gaps
Squeaks occur when floorboards rub against each other or lift slightly from the subfloor. This movement is often caused by bending in the subfloor beneath the hardwood, loose nails or other fasteners, or movement in the supporting beams called joists.
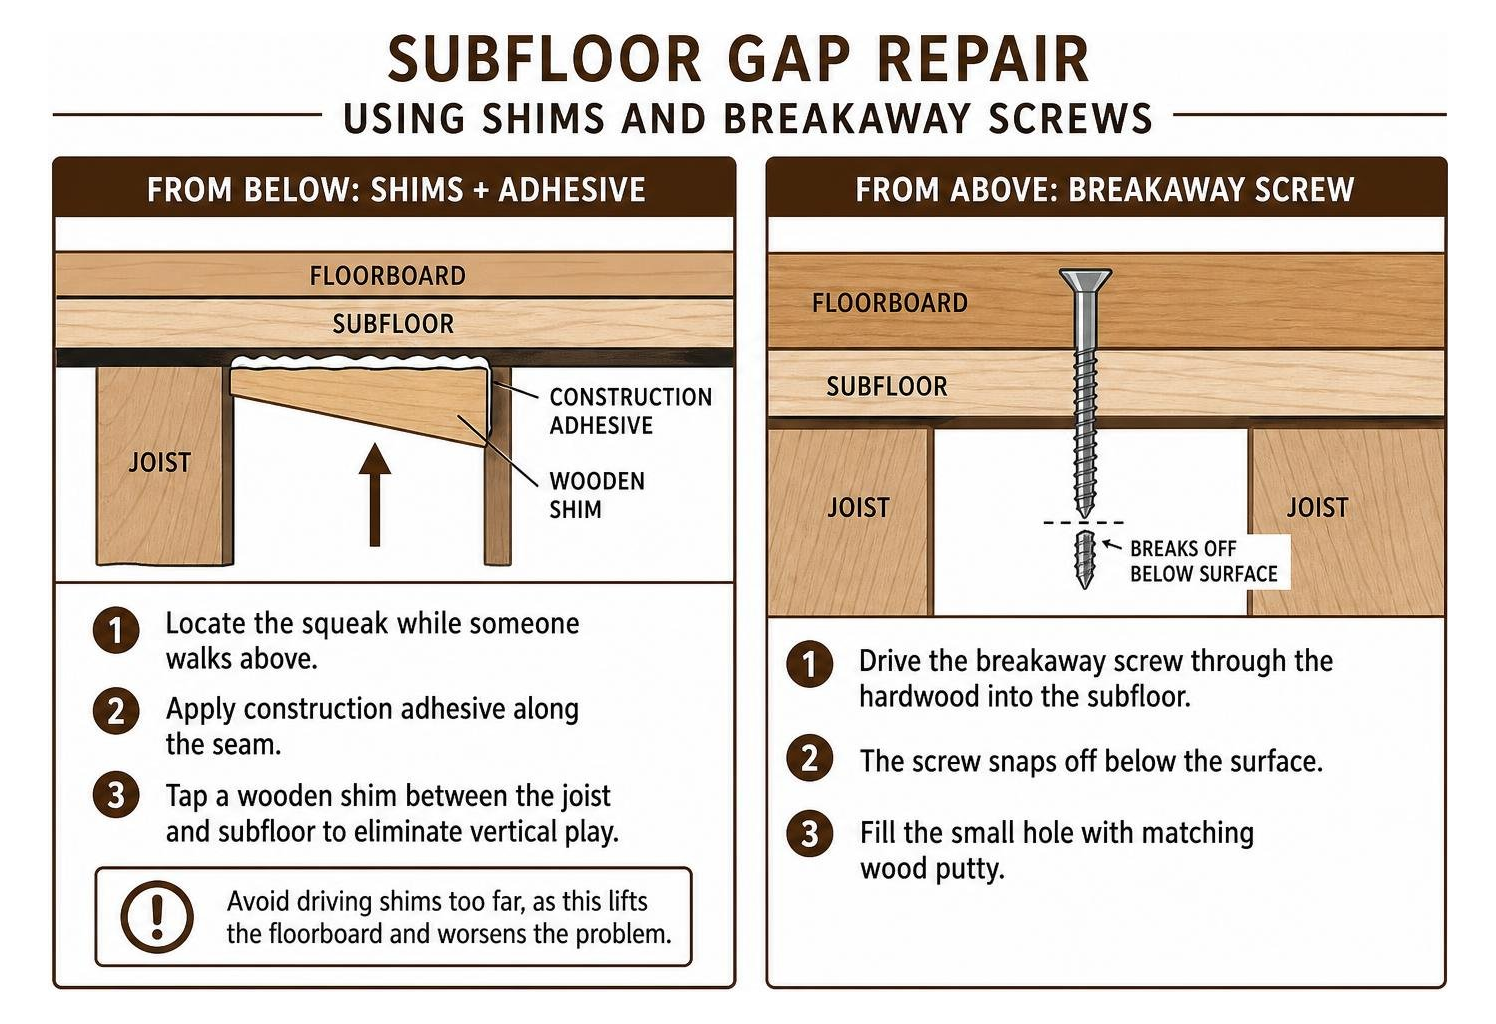
Squeak repairs can damage boards or concealed utilities if fasteners are misplaced. Have a flooring professional identify the cause and choose a repair method. Common approaches include:
- From below (basement or crawlspace): A professional locates the squeak while someone walks above. Construction adhesive and a wooden shim between the joist and subfloor can stop up-and-down movement. Driving a shim too far can lift the floorboard and worsen the problem.
- From above: When access beneath the subfloor is unavailable, specialized breakaway screw kits can secure the hardwood to the subfloor. The screw snaps off below the surface, leaving a small hole that can be concealed with matching wood putty.
Seasonal gaps are another common issue in northern climates. Hardwood naturally shrinks in dry winter months and expands during humid summers. Never fill seasonal winter gaps with rigid putty. When humidity rises, the expanding boards compress the dried filler, resulting in cracked edges or upward buckling. Proper indoor humidity control is the safest way to minimize seasonal movement. For persistent movement or loose boards across wider areas, consulting a professional flooring contractor helps ensure subfloor integrity.
When does a damaged hardwood board need replacement?
When a single board is split, deeply gouged, or stained beyond what surface spot sanding can address, individual board replacement becomes necessary. Replacing one piece prevents the need to disrupt the rest of the room.
When Board Swaps Require Professional Care
Replacing a damaged board calls for professional care. An interlocking plank has a projecting edge (tongue) that fits into a slot (groove) on the next board. A flooring professional may use specialized cutting tools and precise cuts to protect neighboring boards. A typical board replacement may involve:
- Relieving tension: The technician marks the interior of the damaged board and uses an oscillating multi-tool or circular saw set precisely to the board’s thickness. Making relief cuts down the center allows the board to collapse inward without damaging adjacent tongues.
- Prying the pieces: Using a sharp chisel and small pry bar, the center pieces are lifted out, followed by the remaining tongue and groove edges.
- Subfloor preparation: Old fasteners, dried adhesives, and debris are cleaned from the subfloor void to ensure a flat, stable foundation.
- Fitting the replacement: The lower lip of the replacement board’s groove is carefully shaved away. This lets the board drop into place over the existing tongue.
- Fastening: Quality wood adhesive is applied along the subfloor and mating edges. The plank is secured with finish nails placed where they will be hidden, and the small nail holes are filled.
The replacement board must match the existing wood species, grain pattern, and moisture content. Maintaining perimeter expansion gaps of approximately 3/8 to 5/8 inch ensures the newly installed plank has room to adjust to seasonal humidity without binding.
Water Damage, Cupping, and Subfloor Integrity
Water intrusion presents challenges that go beyond simple surface fixes. When moisture gets trapped beneath hardwood, the bottom of the boards expands faster than the top, causing the edges to rise in a phenomenon known as cupping.
Have a flooring professional assess water-damaged boards before sanding or refinishing. Repairs started before moisture conditions stabilize can fail. Before repair work begins:
- Identify and eliminate the plumbing leak or exterior moisture source.
- Test the wood with a calibrated moisture meter; stable indoor hardwood must register between 6% and 9% moisture content according to standards from the National Wood Flooring Association.
- Allow the floor to dry naturally with dehumidifiers and air movers for several weeks. Rushing to sand cupped boards while wet flattens the raised edges, but causes the wood to “crown” (dish in the center) once it finally dries out.
If water has caused persistent black mineral staining, rot, or subfloor swelling, surface patches will fail. Severely degraded areas must be cut back to sound material, the subfloor leveled, and new boards laced in seamlessly before proper hardwood installation techniques are used to restore structural stability.
Why can spot sanding be hard to blend into the rest of the floor?
Spot sanding an isolated mark sounds straightforward, but blending a single sanded spot into an aged floor is notoriously difficult. Natural wood changes color with light exposure, and surface sheens dull gradually over time.
| Characteristic | Spot Patch Repair | Full Room Refinishing |
|---|---|---|
| Primary Scope | Isolated scratch, dent, or single board | Entire continuous floor surface |
| Equipment Used | Hand tools, orbital sander, artist brush | Large belt sander, edge sander for room borders, sander with multiple rotating discs |
| Dust Management | Localized drop cloths, basic vacuum | High-powered dust containment systems |
| Finish Uniformity | May show subtle sheen transitions | More consistent color and sheen across the room |
| Turnaround Time | A few hours | About 4 working days |
| Best Suited For | Minor accidents in low-visibility spots | Widespread wear, pet stains, bare wood |
Limitations of Spot Sanding on Large Areas
Spot sanding an isolated section of an open floor can cause several problems. We assess these risks before recommending a repair:
- The “Halo” Effect: Sanding can create a shallow depression in the wood that catches light differently, leaving a noticeable circle or divot.
- Color Inconsistency: Freshly exposed raw wood rarely matches the aged, ambered tone of the surrounding finish.
- Sheen Mismatches: Polyurethane is a clear protective coating. Matching its new gloss level to an older coating is difficult on a spot repair.
- Adhesion Failure: Applying modern finishes over old wax residues or incompatible sealers can cause the new topcoat to peel around the repair edges.
For engineered wood floors, extra caution is necessary. If the top wear layer of an engineered plank is thinner than 2mm, aggressive sanding will burn through the veneer to the plywood core beneath, ruining the floor permanently.
Dust-Contained Sanding and Custom Color Matching
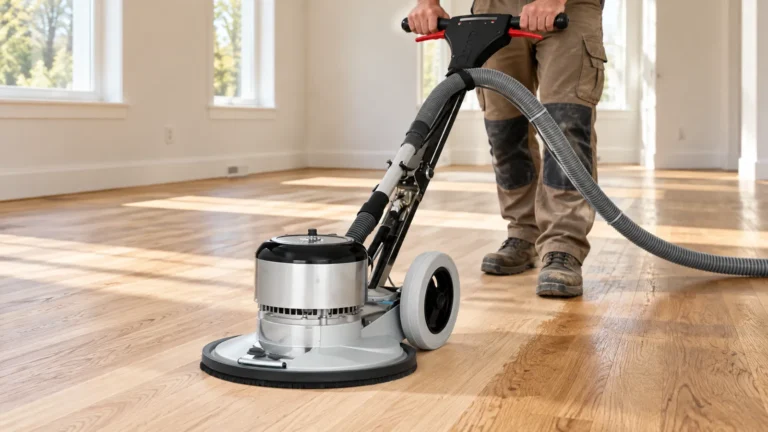
When finish wear spreads across main walkways, or when damage spans multiple boards, full room restoration delivers the cleanest result. Our hardwood floor sanding uses Oneida Vortex DCS and Bona Portable DCS 2.0 dust-containment systems. They collect dust at the sanding equipment and greatly reduce airborne dust, but no sanding process is completely dust-free.
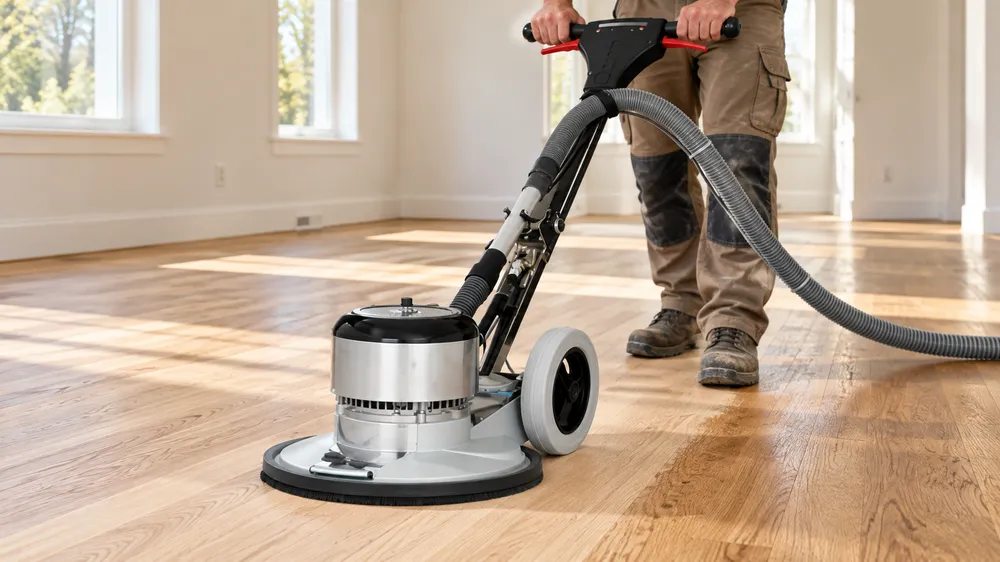
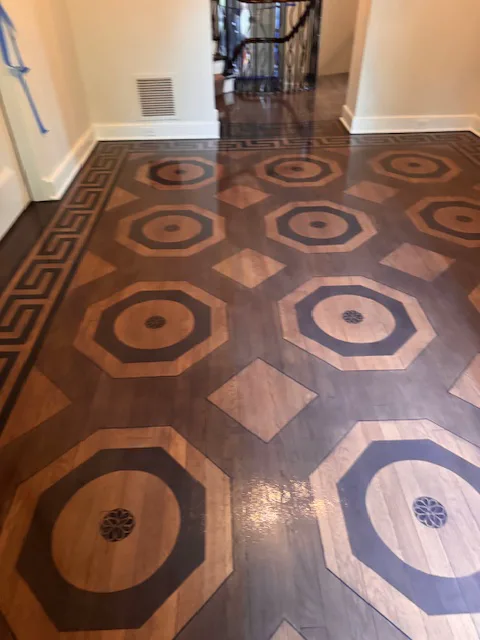
Professional restoration removes old surface wear, flattens uneven boards, and progressively polishes the wood grain to eliminate visible scratches. If you wish to alter the tone of your floor, dedicated hardwood floor staining samples can be applied directly to the prepared raw wood so colors are evaluated under real room lighting. We then apply commercial-grade protective finishes such as Bona Traffic HD or Loba Supra A.T., typically in satin.
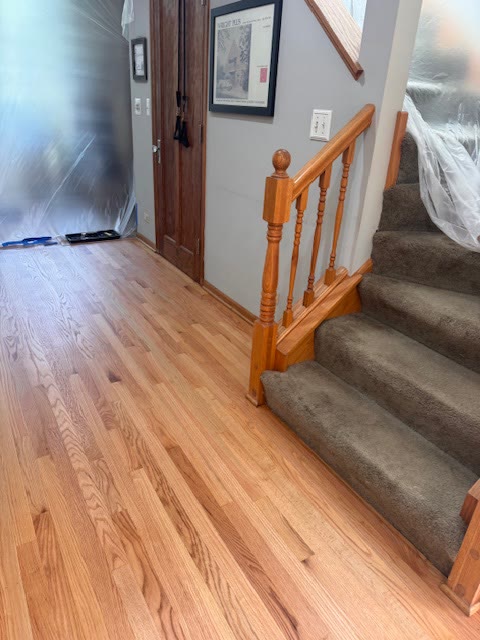
A complete floor refinishing process restores the entire floor to a smooth, uniform surface that helps protect the wood from everyday wear.
What factors influence hardwood floor repair costs?
Repair costs depend on the damage’s extent and depth, replacement wood availability, and subfloor condition. Fitting new boards into the existing floor and matching its finish also affect the work required.
- Extent and Depth of Damage: A surface scratch that requires light hand scraping and touch-up is simpler than addressing deep rot or structural subfloor sag.
- Wood Species and Availability: Common red oak and white oak are straightforward to source and match. Rare species, antique reclaimed boards, or non-standard plank widths require cutting and shaping replacement boards to size to achieve an exact fit.
- Subfloor Condition: If moisture has degraded the plywood subfloor beneath the hardwood, the subfloor must be cut out, reinforced, and leveled before surface planks can be reinstalled.
- Lacing and Weaving Requirements: Replacing boards across an open threshold requires staggered cuts and “lacing in” new material into the existing pattern so the repair line remains invisible.
- Finish Type and Sheen Matching: An oil-modified finish is a type of oil-based protective coating. Blending a spot repair into it requires careful work at the repair edges and color matching. Full-room sanding avoids the transitions between a spot repair and the surrounding finish.
What should homeowners know before choosing a hardwood floor repair?
The right repair depends on the depth of the damage, moisture conditions, and the floor’s construction. A professional assessment can help determine whether a patch, board replacement, or refinishing is suitable.
Can deep gouges and water stains be fixed with a simple patch?
Shallow gouges that do not compromise structural stability may be filled with color-matched epoxy or hard wax and sealed. A flooring professional can check whether the repair material is compatible with the existing finish. Dark stains from standing water or pet accidents can involve reactions between moisture, minerals, and tannins, naturally occurring compounds in the wood. If discoloration extends too deeply for sanding to remove safely, the affected boards may need replacement.
How do I know if engineered hardwood can be sanded?
Whether an engineered floor can be sanded depends on the thickness of its top hardwood veneer, known as the wear layer. If the wear layer is 3mm or thicker, it can usually be sanded and refinished at least once by a skilled professional. If the wear layer is less than 2mm, sanding runs a severe risk of cutting into the plywood backing. For thin wear layers, ask a flooring professional whether a screen and recoat—light abrasion of a compatible existing finish followed by a new coat—or individual board replacement is suitable.
When does a damaged floor require full refinishing instead of a spot repair?
Spot repairs are ideal when damage is confined to a single discrete board or a small corner that is out of direct sunlight. If you notice bare wood exposed in primary walking paths, widespread finish peeling, gray discoloration from foot traffic, or cupping across multiple boards, spot fixes will leave visible patch marks. In those situations, complete room sanding and recoating is the only way to achieve a uniform, durable surface.
Hardwood Floor Handyman or Flooring Specialist: Which Do You Need?
Caring for residential hardwood floors requires knowing when a simple patch will preserve your floor and when extensive repairs are needed to protect your home. A hardwood floor handyman can often handle small fixes, while sanding, refinishing, and board replacement need a dedicated hardwood flooring company. However, deep moisture stains, buckling boards, and widespread finish wear require professional attention and proper subfloor preparation.
Access Wood Flooring is a family-owned hardwood flooring company founded in 1996 and based in Hoffman Estates, IL. We provide comprehensive hardwood floor services for solid and engineered wood floors. Our team handles detailed board lacing, precision dust-contained sanding, and custom color matching for homeowners throughout Chicago’s North Shore and the northwest suburbs.
To evaluate your floor’s condition and discuss your options, request a free in-home written estimate.