Engineered hardwood can often be repaired with spot touch-ups, recoating, or plank replacement. The best option depends on the damage, floor construction, and thickness of the real-wood surface.
What should you check before repairing engineered hardwood?
Check the thickness of the real-wood wear layer to help determine whether sanding is an option. Have a flooring professional assess the floor’s construction and cause of damage before choosing a repair.
Start by measuring the real-wood wear layer. Its thickness helps determine whether sanding is an option. Other repairs include spot touch-ups, board replacement, or lightly scuffing and recoating the finish. Engineered wood flooring has a real hardwood surface, called the lamella or wear layer, bonded to a structural core. That core may be layered plywood, high-density fiberboard (HDF), or stone plastic composite (SPC). In plywood cores, layers with grain running in different directions help limit expansion and shrinkage. With proper preparation and manufacturer approval, engineered wood flooring can be installed over concrete or radiant heat. The thin real-wood surface limits how repairs can be done.
To choose the proper repair path, measure your floor’s wear layer. Check the veneer thickness at a floor register or an expansion seam under a transition strip. You can also measure an off-cut saved from the original installation. Measure the visible top wood layer above the cross-ply core using a digital caliper or a fine-ruled millimeter gauge.
DIY repairs can damage the thin wood surface or locking joints. Heat and steam can harm the finish or loosen bonded layers. Sawing and drilling can damage the subfloor or hidden utilities. Incompatible fillers or adhesives can make repairs worse. We recommend hiring a flooring professional, especially for sanding, moisture damage, adhesive injection, and plank replacement.
Why Wear Layer Depth Dictates Your Repair Strategy
A heavy drum-sanding pass removes wood and reduces the remaining wear layer. Aggressive sanding can cut through a thin wear layer and expose the plywood beneath it. This is called sanding through the veneer, and the damaged board may need replacement.
Use this table as a general guide, not a guarantee of sanding capacity. Previous sanding, floor condition, and the manufacturer’s limits also matter. Have a flooring professional confirm the safe repair options.
| Veneer Thickness | Feasible Repair Methods | Infeasible Techniques |
|---|---|---|
| < 2 mm (Very Thin) | Spot touch-up, wax filler, single plank replacement, screen-and-recoat | Full rotary drum sanding |
| 2 mm – 3 mm (Medium) | Spot filling, board replacement; sanding or refinishing only after professional assessment | Aggressive multiple re-sandings |
| 4 mm – 6 mm (Thick) | Complete resanding and stain color changes if the remaining wear layer and manufacturer’s limits permit | Sanding beyond the remaining wear layer or manufacturer’s limits |
Diagnosing Moisture vs Installation Defects Before Fixing Engineered Hardwood Floors
Moisture and installation problems can cause damage that resembles a product defect. Before starting any physical repair, determine whether your issue stems from excessive environmental water or structural installation errors.
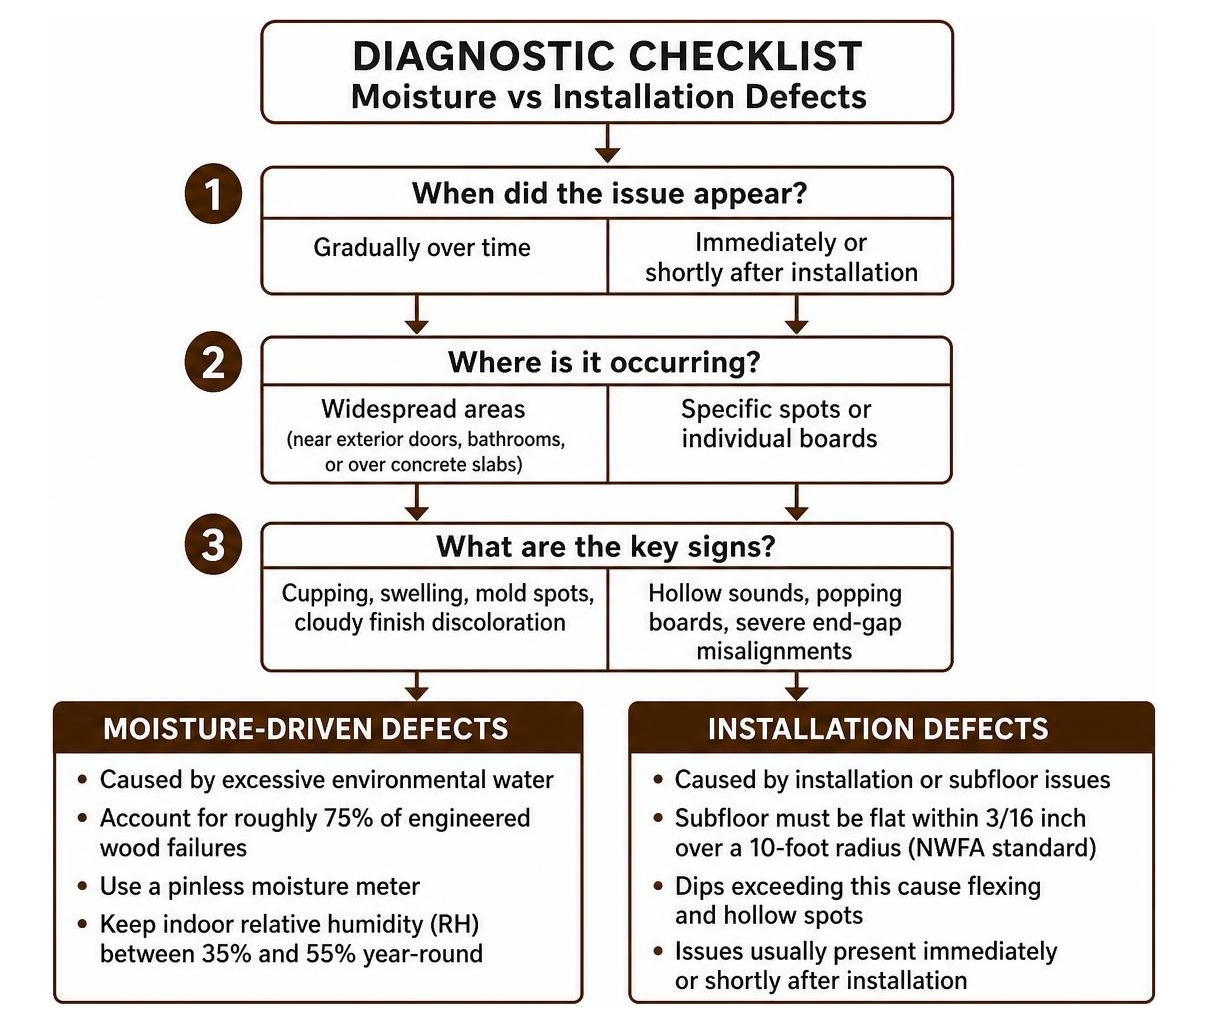
Use these signs to help identify the cause:
- Moisture-Driven Defects: Cupping, swelling, mold spots, and cloudy finish discoloration may develop gradually across larger areas. Check near exterior doors, bathrooms, and above unsealed concrete slabs. Use a pinless moisture meter to check for moisture. Keep indoor relative humidity (RH), a measure of moisture in the air, between 35% and 55% year-round.
- Installation Defects: Hollow spots, popping boards, and badly misaligned end joints may appear immediately or shortly after installation. According to National Wood Flooring Association (NWFA) industry standards, the subfloor must be flat within 3/16 inch over a 10-foot span. Larger dips can let floating boards bend and sound hollow underfoot.
How can you repair scratches, gouges, and dents in engineered hardwood?
Daily foot traffic, shifting furniture, and active pets inevitably leave marks on your flooring. Light scratches may need a compatible touch-up product, while deeper gouges may need filler or plank replacement.
Removing Light Scratches and Resolving Pitted or Flaking Finishes
Superficial scratches only breach the clear protective coat without gouging the wood beneath.
- Clean the Surface: Wipe away all grit and dust using an alcohol-free, pH-neutral wood floor cleaner.
- Apply Color and Wax: Use a color-matched wax touch-up stick or blending pencil. Rub the wax firmly across the grain to fill the scratch. Then wipe along the grain with a clean microfiber cloth.
- Blend the Sheen: If the clear coat shows faint white hazing, use a very small brush to apply a tiny drop of compatible water-based polyurethane. This is a clear protective finish.
If your finish appears pitted, peeling, or flaking, the cause is often surface contamination from silicone-based polishes or wax cleaning sprays. For widespread surface haze, professional floor recoating involves removing contaminants and mechanically scuffing the finish. A fresh clear coat is then applied without removing the wood veneer.
Repairing Deep Gouges, Holes, and Impact Dents
When a heavy object penetrates the wear layer into the core, follow this restoration method:
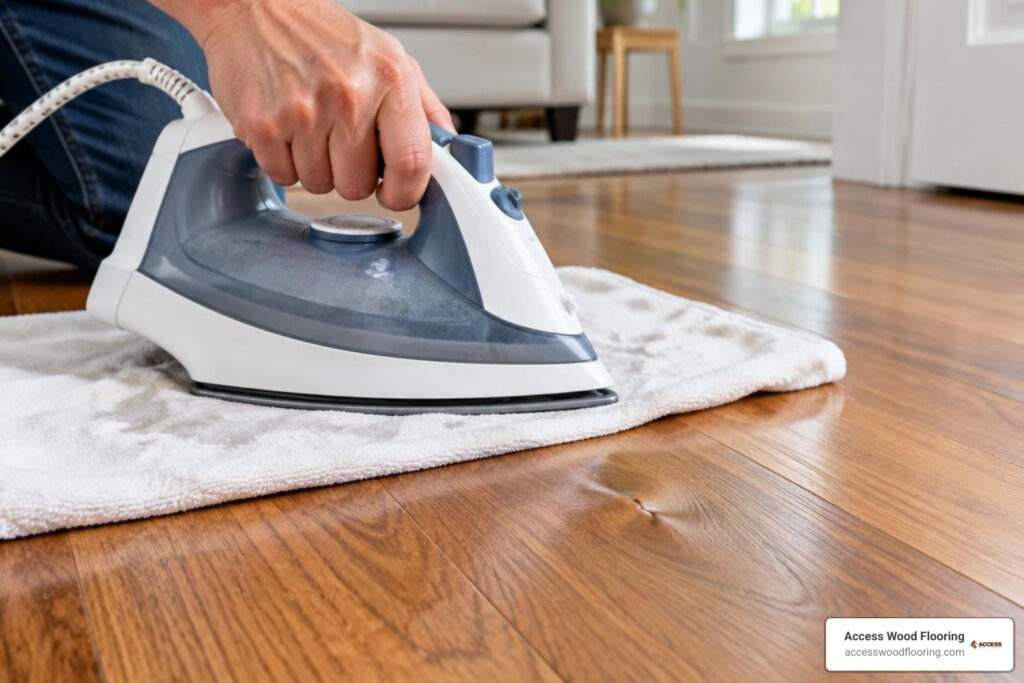
- Steam Shallow Dents: Heat and moisture can damage engineered flooring. Have a professional confirm that this method is suitable before trying it. If the wood fibers are crushed but unbroken, place a lightly dampened cotton cloth over the dent. Apply a warm household iron over the cloth in short 3- to 5-second bursts. Steam can help compressed fibers swell back toward their original shape. Let the spot dry completely for 24 hours.
- Pack Deep Gouges: For chips or torn fibers, work an epoxy wood putty or color-matched wood filler into the depression with a plastic putty knife. Overfill slightly if the product shrinks as it cures.
- Professional Leveling: Once the filler cures, have a flooring professional assess whether the patch needs leveling. Sanding can damage the adjacent factory finish or thin wear layer.
- Custom Color Matching: Use wood stain markers to recreate grain lines. Use hardwood floor staining techniques to blend the color. Then seal the repair with a finish that matches the surrounding shine.
How can you address cupping, crowning, buckling, and endlifting?
Environmental humidity swings and moisture intrusion from unsealed subfloors stress the cross-ply core, causing planks to deform. Stop the moisture source and have a flooring professional assess drying and repair options.
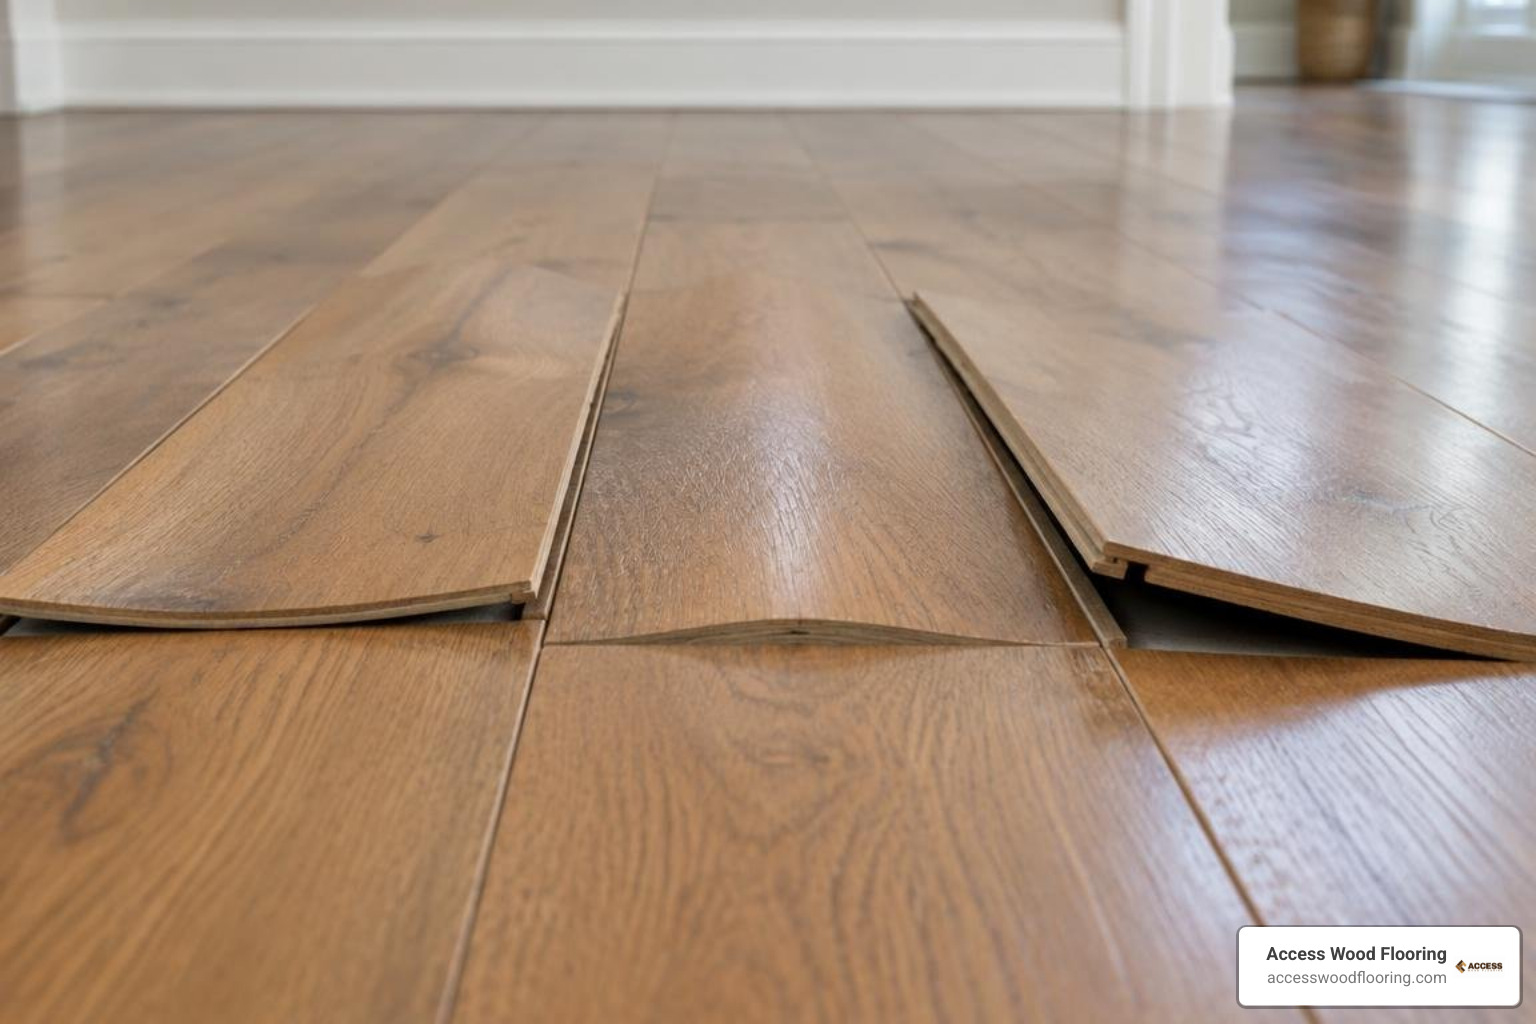
Cupping, Crowning, and Buckling Solutions
- Cupping (Edges Higher Than Center): Cupping can occur when the underside of a plank is wetter than the top, causing the lower layers to swell. Do not sand a cupped floor while it is wet. Sanding the raised edges too soon can leave the center higher than the edges after drying. Stop the water source and have a professional assess drying needs, including commercial dehumidifiers. Recovery time varies with the moisture source and extent of damage. Have a professional monitor drying and assess whether the boards recover.
- Crowning (Center Higher Than Edges): Crowning can happen when the surface is wetter than the underside. It can also result from sanding a cupped floor before moisture levels even out. Restore indoor relative humidity to 35%–55%. Once moisture levels are even throughout the plank, have the wear layer checked. A professional can assess whether light sanding can flatten the surface.
- Buckling (Planks Detaching and Lifting Off Subfloor): Buckling can happen when expanding planks lack enough space around the room’s edges. Expansion gaps are typically 1/4 inch to 1/2 inch, but the floor manufacturer’s requirements govern. Have a professional check the moisture source and installation before cutting or weighting boards. A repair may involve removing the shoe molding, the narrow trim at the floor’s edge. An oscillating multi-tool—a power tool with a small vibrating blade—can trim planks pressing against walls or door frames. Weighting should only be used when appropriate for the floor and repair method.
Repairing Endlifting vs Cupping in Plank Joints
Homeowners often mistake endlifting for standard board cupping. While cupping runs along the long edges of the board, endlifting occurs strictly at the short butt ends of engineered planks.
When moisture enters unsealed end joints, the core layers can swell more than the top wood layer, or lamella. This can curl the short ends upward. Steam mops and standing water can contribute to this damage. To address endlifting:
- Stop using steam mops and remove any source of standing water.
- Direct drying fans across the seams for 7 to 10 days, while checking moisture levels. Drying time can vary.
- If the core remains lifted after moisture levels stabilize, have a professional assess the joint. An approved repair may use elastomeric adhesive, which stays flexible after curing. Protect the surface with wax paper and follow the adhesive manufacturer’s weighting and curing instructions.
How can you fix loose planks, gaps, and hollow spots?
Plank movement, seasonal shrinkage, and void pockets between the subfloor and the wood require targeted hardwood floor repair before structural damage spreads. Repair options include reconnecting floating planks, filling stable gaps in glued floors, and professionally assessing hollow spots for adhesive injection. Have a professional identify the cause before drilling or forcing joints.
Eliminating Gaps and Squeaks in Floating and Glued Installations
Gaps can appear when winter heating lowers indoor humidity and planks shrink:
- Closing Gaps on Floating Floors: Use a flooring suction gap tool or tapping block approved for your floor. Vacuum the open seam. Place the suction block firmly on the disconnected plank and tap it toward the gap with a rubber mallet. The aim is to reconnect the board’s projecting edge, or tongue, with the matching groove. Stop if the joint will not reconnect; forcing it can damage the edges.
- Filling Gaps in Glued Floors: If boards cannot move and the gap is stable, gaps under 2 mm may be filled with compatible, color-matched acrylic filler. Use a flexible product intended to allow seasonal movement.
- Silencing Squeaks: Friction between neighboring board edges can cause squeaks. Powdered graphite or unscented talcum powder may reduce friction when brushed into the seam, but check compatibility first. If the wood subfloor is accessible from a basement, a professional can secure loose sections from below with suitable subfloor screws.
Fixing Hollow Spots and Raised Planks with Adhesive Injection
Hollow spots occur when adhesive fails to bond or subfloor low points create air pockets underneath glued installations.
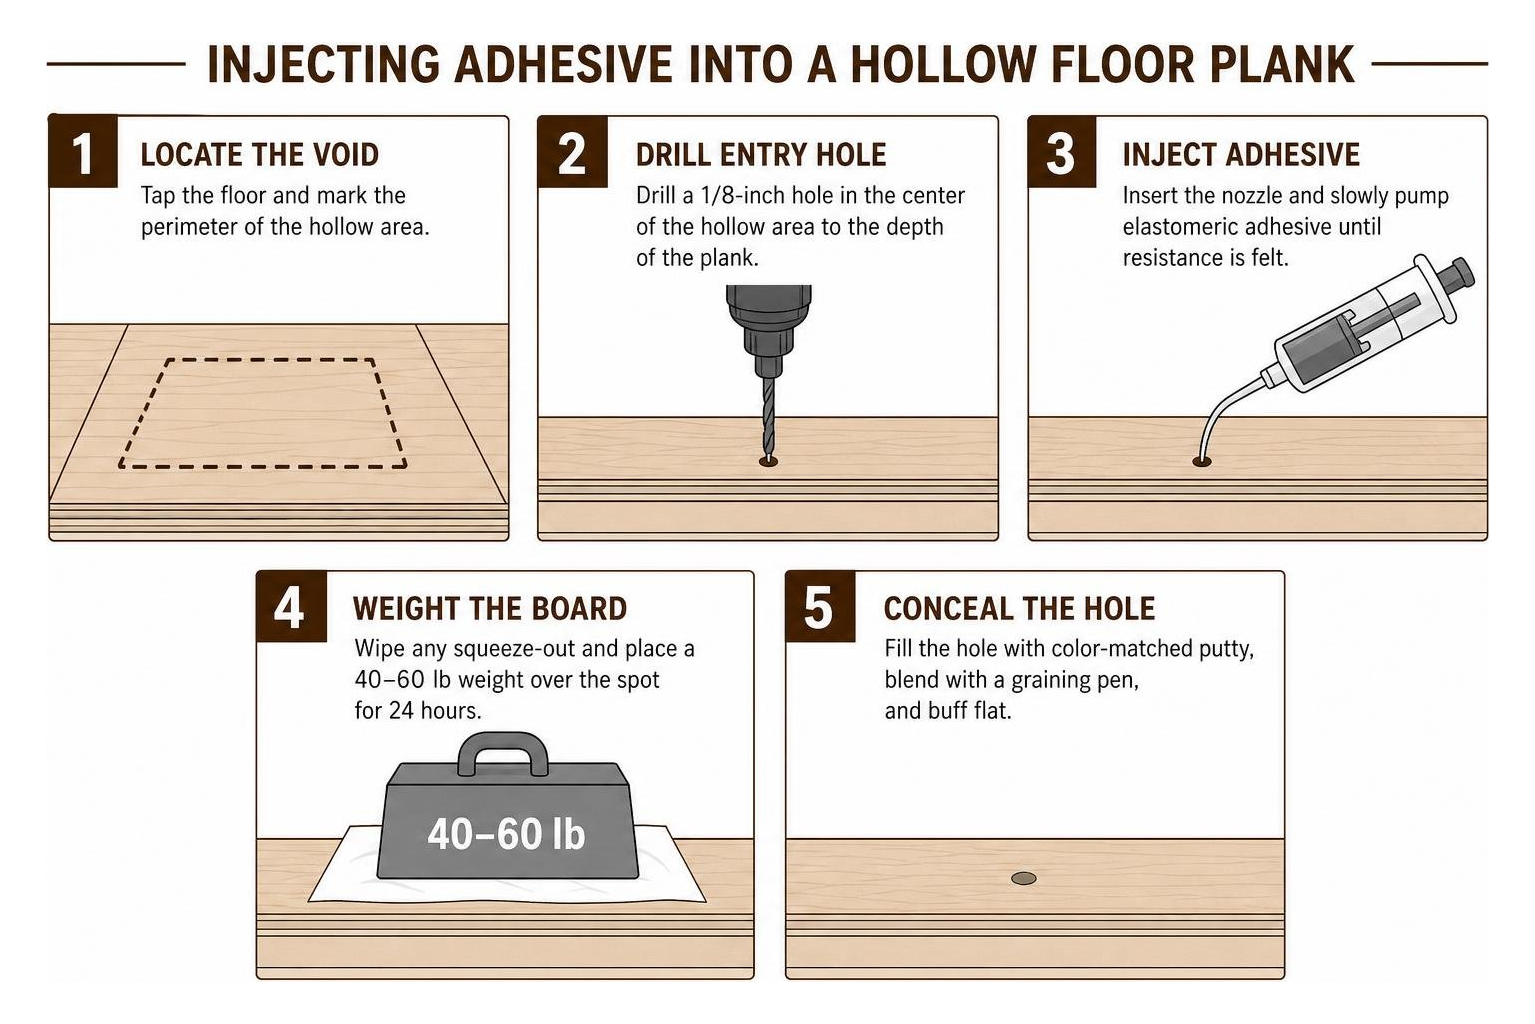
- Locate the Void: On a glued-down floor, tap lightly with your knuckles or a solid wood rod. Mark the edges of hollow-sounding areas with painter’s tape. Have a professional confirm that adhesive injection is appropriate.
- Drill Entry Holes: The repair may use a 1/8-inch hole through the plank. Set a depth-stop collar to the plank’s exact thickness to limit drilling depth. Check for hidden utilities before drilling.
- Inject Flexible Adhesive: Insert the nozzle of an engineered floor adhesive injection syringe into the hole. Use a manufacturer-approved injection adhesive. A low-viscosity adhesive flows easily, and an elastomeric adhesive remains flexible after curing. Follow its instructions for injection pressure and amount.
- Weight the Board: Remove excess adhesive promptly with the manufacturer’s recommended cleaner. Some repair methods call for a 40- to 60-pound weight for 24 hours. Follow the product’s instructions for the required weight and curing time.
- Conceal the Drill Hole: Fill the hole with compatible, color-matched repair putty. Blend the grain with a graining pen and smooth the patch level with the floor.
When should you replace damaged planks instead of refinishing?
A board with deep gouges, extensive separation between the core layers, or burn damage may need replacement. Replacing one damaged board can be more practical than refinishing the entire room. Have a flooring professional confirm the best approach.
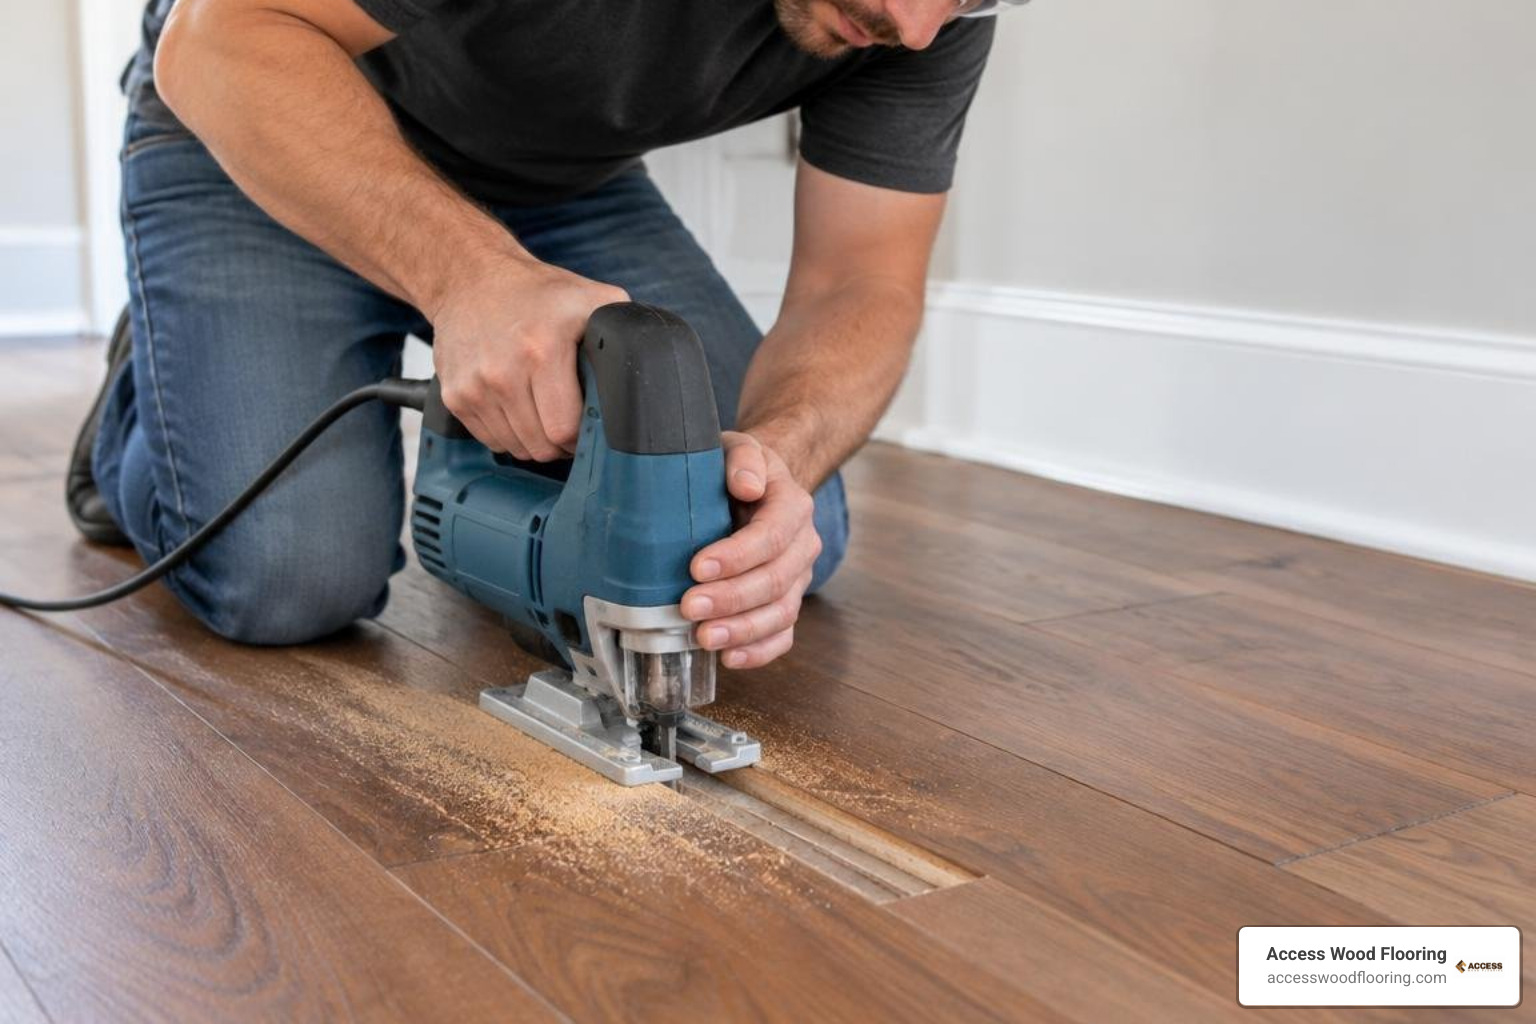
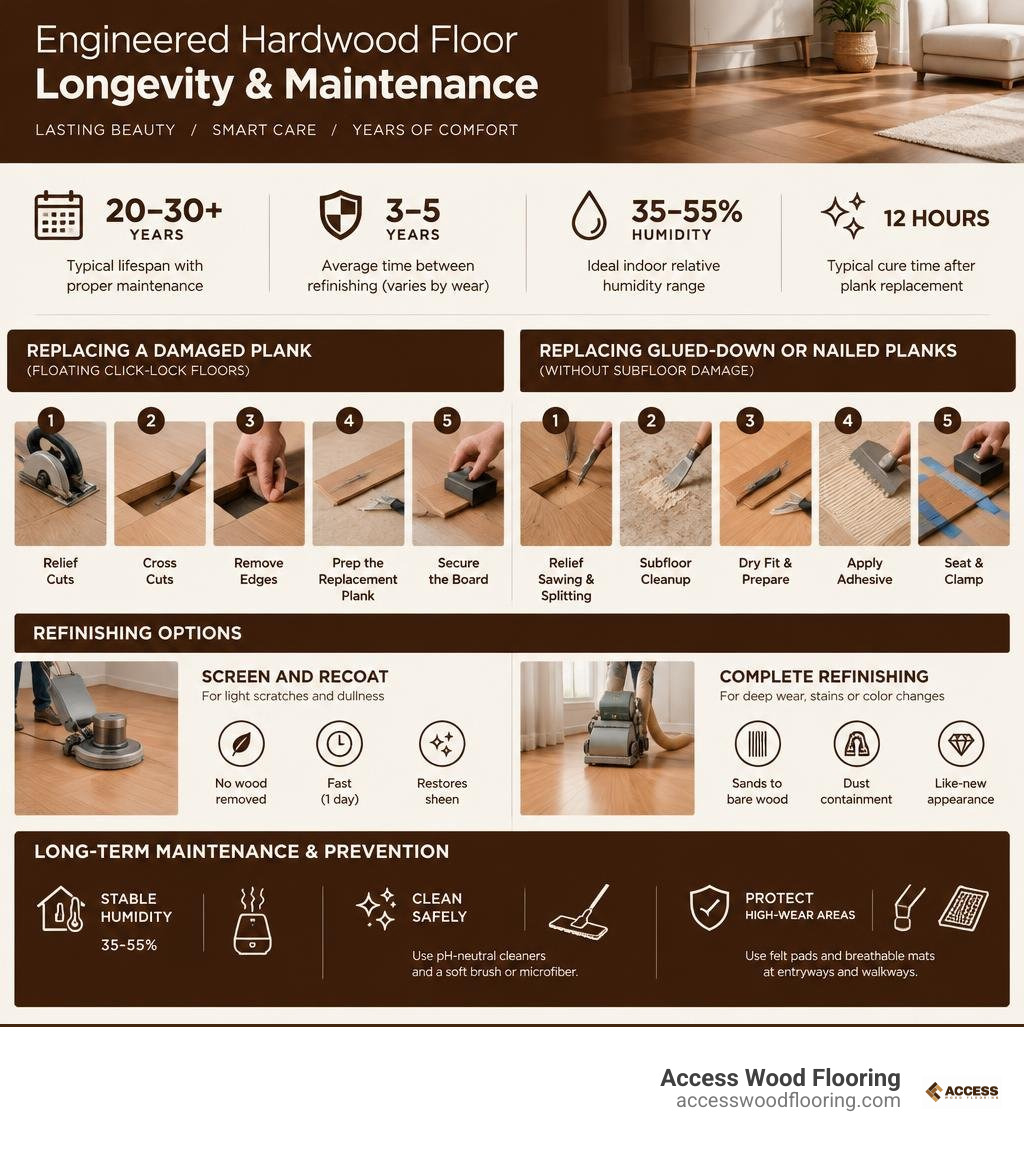
Step-by-Step Plank Replacement for Floating Click-Lock Floors
- Relief Cuts: Have a professional confirm the replacement method for your click-lock floor. Set the circular saw or track saw cutting depth to the plank’s thickness. Check for hidden utilities before cutting. Make two parallel plunge cuts, lowering the blade into the board rather than starting at an edge. Run them along the damaged board, roughly 1 inch inward from each side.
- Cross Cuts: Connect the cuts with diagonal cuts to form an internal cutout. Lift out the center section with a pry bar.
- Remove Edges: Carefully remove the remaining edge strips. Avoid damaging the projecting tongues and matching grooves on neighboring boards.
- Prepare the Replacement Plank: Use a matching spare plank. If the floor manufacturer permits this repair, remove the bottom lip of the groove on the long edge and short end with a sharp chisel or utility knife.
- Secure the Board: Apply a thin bead of PVA wood glue, a common type of wood adhesive, approved for the floor’s tongue-and-groove joints. Lower the new plank into place and press it level. Wipe away excess glue and follow the glue manufacturer’s weighting and curing instructions.
Replacing Glued-Down or Nailed Planks Without Subfloor Damage
- Relief Sawing and Splitting: Have a professional check the plank thickness and any hidden utilities before cutting. Make cuts in a triangular pattern in the board’s center to create a removable section. Chisel that section free and lift it out.
- Subfloor Cleanup: Use a sharp, wide wood chisel to lift the glued layers from the subfloor. For nailed boards, carefully remove or cut the fasteners. Scrape away old adhesive ridges without gouging the concrete or plywood.
- Dry Fit and Prepare: Test fit the matching replacement plank before applying adhesive. If the approved repair requires it, remove the bottom lip of the groove so the board can drop into place.
- Apply Adhesive: Spread a compatible flexible flooring adhesive over the subfloor. Use the manufacturer-specified notched trowel, which has teeth that spread adhesive in ridges.
- Seat and Clamp: Press the new plank into the adhesive bed. Check that it is level with adjacent boards. Use finish-safe painter’s tape on the joints if permitted, and apply weights as directed until the adhesive cures.
Refinishing Considerations: Full Sanding vs Screen and Recoat
If widespread light scratches and dullness cover the room, compare your floor’s wear layer against standard refinishing processes:
- Screen and Recoat: If the wood is in good condition and only the clear finish is scuffed, a screen and recoat may be suitable. This process scuffs the finish rather than sanding the wood. It helps preserve the wear layer and usually takes about one day. A professional should check that the existing finish is compatible with recoating.
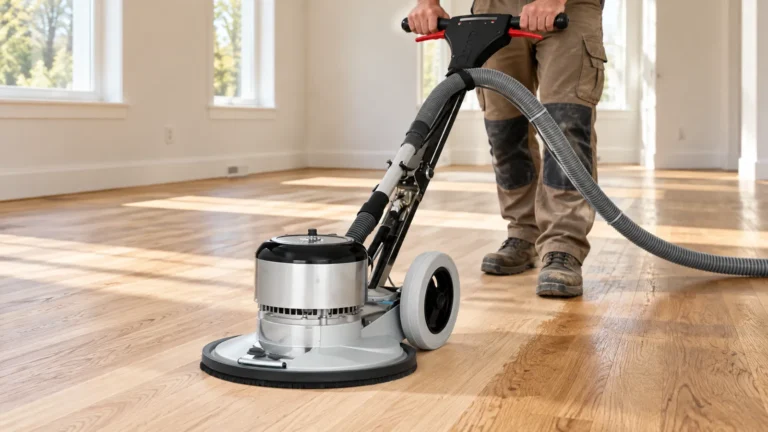
- Complete Floor Refinishing: Deep wear, pet urine stains, or a desired color change may call for floor refinishing. This involves hardwood floor sanding down to bare wood. A veneer of 3 mm or more may allow sanding, but thickness alone does not guarantee it is safe. Have a professional check the remaining wear layer, previous sanding, and manufacturer’s limits. Our team uses dust containment floor sanding equipment to collect dust as old finishes are removed. Dust containment reduces airborne dust but does not eliminate it. Our wood floor refinishing process renews the floor’s finish. Sanding and refinishing usually takes about four working days.
How can you prevent future engineered hardwood damage?
Engineered hardwood floors that receive proper routine maintenance regularly last 20 to 30 years or longer. Help prevent damage by keeping indoor humidity stable, cleaning with manufacturer-approved products, and using furniture pads and suitable entry mats.
Best Practices for Fixing Engineered Hardwood Floors and Preventing Recurrent Damage
- Keep Indoor Humidity Stable: Maintain indoor relative humidity between 35% and 55% year-round using whole-home humidifiers in winter and air conditioning or dehumidifiers in summer.
- Clean Safely: Sweep or vacuum regularly with a soft brush attachment. Never use steam cleaners, soaking wet string mops, acidic vinegar solutions, or harsh oil-soap concoctions. Use only manufacturer-approved, pH-neutral wood floor cleaners misted lightly onto a microfiber pad.
- Protect High-Wear Areas: Apply thick wool felt protective pads under all furniture legs and inspect them periodically for embedded grit. Place breathable, non-rubber backed mats at every exterior doorway and high-traffic walkway.
- Schedule Professional Maintenance: When regular cleaning no longer revives your floor’s luster, consult our comprehensive services for professional inspection, maintenance coating, and structural repairs.
What else should you know about engineered hardwood repairs?
Repair options depend on the extent of damage and the condition of the wear layer and core. A flooring professional can help determine whether a spot repair, plank replacement, or full replacement is appropriate.
How do you repair water-damaged engineered wood flooring?
First, stop the moisture source immediately. Extract all standing surface water and deploy commercial air movers and dehumidifiers. Have a flooring professional monitor moisture and confirm that the floor has dried before deciding on repairs. Replace damaged planks if the core layers have separated or mold has formed. Also replace boards that remain severely cupped after complete drying.
Can you spot repair engineered hardwood floors without sanding the whole room?
Yes. You can repair isolated damage using color-matched epoxy wood filler, wax touch-up kits, or stain pens. If a single plank is severely damaged or gouged, you can cut out and replace that individual board without disturbing or sanding the surrounding floor.
When should you replace an engineered wood floor instead of repairing it?
Full replacement is recommended if the subfloor is no longer structurally sound or the veneer has been sanded past its limit. Widespread mold beneath the underlayment is another reason to replace the floor. Compare repair and replacement estimates with a flooring professional. Consider the extent of damage and the remaining wear layer before deciding.
What is the next step for repairing your engineered hardwood floor?
First, identify the cause of damage and check the real-wood wear layer’s thickness. Then choose the least invasive suitable repair and match it to your floor’s construction. This applies whether you are filling a dent, injecting adhesive into a hollow spot, or replacing a water-damaged plank.
If you are unsure of your floor’s wear layer thickness, our family-owned team can help. We also assess widespread cupping, buckling, and loose planks. At Access Wood Flooring, we serve homeowners on Chicago’s North Shore and northwest suburbs within a 30–40 mile radius of Hoffman Estates. We offer free in-home estimates with laser measurement and a detailed written estimate. Our services include dust-contained sanding and refinishing and hardwood floor repairs. Get a free in-home estimate.